
A beautiful and neat manicure is always guaranteed to boost your confidence and creativity, not to mention that you look so well put together when your nails are in good shape. We are not talking solely about nail art or charms on those long acrylic nails, although you can choose whatever you fancy, but even your natural nails can look fantastic with the right products and a little bit of help.
Comparison of The BestOverlay for Natural Nails of 2026 UK
Unfortunately, not everyone can grow long and strong nails like you’ve seen in movies due to many variables, like genetics, nutrition, lifestyle or even the bad habit of biting the nails, to name just a few. If you have brittle and thin nails that are prone to braking and you can’t seem to get them to the length that you want, don’t give up just yet. There are simple ways to fix these problems and ensure a strong, beautiful and long-lasting manicure.
Today, we’re looking at the best overlays for natural nails. First, you need to distinguish between nail overlays and nail extensions, as they are two different things with different purposes, although people tend to often confuse them.
What is a nail overlay?
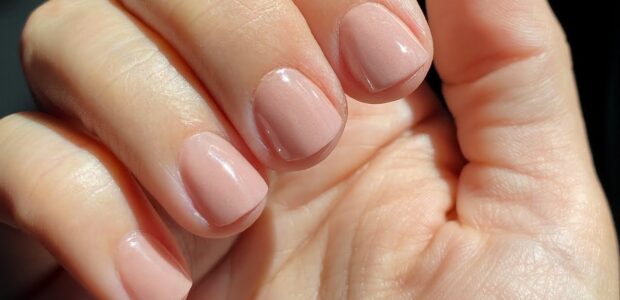
If you want to grow long and healthy nails, but your natural nails are weak, the first thing you need to do is add strength. Overlays are products that go on top of your natural nails to enhance them, make them strong, and overall act like a shield that stops them from braking, hence, eventually being able to reach the length that you desire. Natural nail overlays are not extensions, but they add a strong layer of hard product. This can be a hard gel, or builder gel in a bottle or jar, structure gel or any thick-consistency gels, acrylic or dip-powder and even the latest Polygels (a hybrid between acrylic and gel). These overlays help your natural nails grow underneath and protect them from being exposed to the environment.
Be careful not to confuse gel with gel polish. Gel polish is a semi-permanent polish and it is usually applied in two thin coats of color and finished with a topcoat of the same gel polish. However, this semi-permanent manicure doesn’t provide the same strength as a hard gel does, so it won’t prevent your nails from breaking.
What is a nail extension?
Nail extensions are meant to extend the length of your nails. This can be achieved with plastic tips that are glued to the natural nail, followed by an overlay of acrylic or hard gel. Everything is then filed and shaped to your preference. This method adds length and strength and basically creates a new nail on top of your natural nail, so you can then choose the shape and color that you like. If you struggle to grow your own natural nails and you need a long set ASAP, this is the fastest way to do it.
So, now that you have a better understanding of the difference between those two methods of enhancing and boosting a manicure, let’s look at some overlays. We gathered some of the best products to use as nail overlays so you can have strong nails while also enjoying a beautiful and clean manicure.
1. Kiara Sky Dip Powder Starter Kit
If you’re not on a budget, you don’t like strong odors and you don’t know how to work with gel or acrylic, the dipping powder system might be exactly what you need to strengthen your nails without having to master a certain technique. Let’s get this out of the way: it’s not cheap and you can’t buy just the powder and be done with it because this system requires multiple steps, not just one or two. However, even if it requires more steps, you could get used to it fast if you read the instructions and you don’t have to have any prior experience with any overlays or techniques.
Kiara sky has a few starter kits that include everything you need to achieve flawless manicures. The products are non-toxic, cruelty-free and odorless, which is a great advantage. Also, you don’t need any additional tools like brushes or LED/UV lamps, as the product airdries very quickly. Another advantage that this dip powder system has, is that it doesn’t require a lot of precision on your behalf, which you can’t say about gel or acrylic systems.
It’s also easy to remove. Just remove the shiny layer with a file, soak a cotton pad in acetone and wrap it around your nail using aluminum foil, then wait for about 10 minutes.
At the end of the day, if you want a relatively quick and easy way to strengthen your natural nails, this is an excellent option to start from. Now, let’s see the pros and cons for this dip powder system so you could decide for yourself.
PROS:
• Long-lasting product
• Odorless
• Nontoxic & cruelty-free
• It doesn’t require an LED/UV light
• It doesn’t require precision
• Adds strength to your nails
CONS:
• It can get messy (the powder spills easily)
• It’s pricy
• There are lots of steps to follow
2. NYK 1 Power Builder Gel
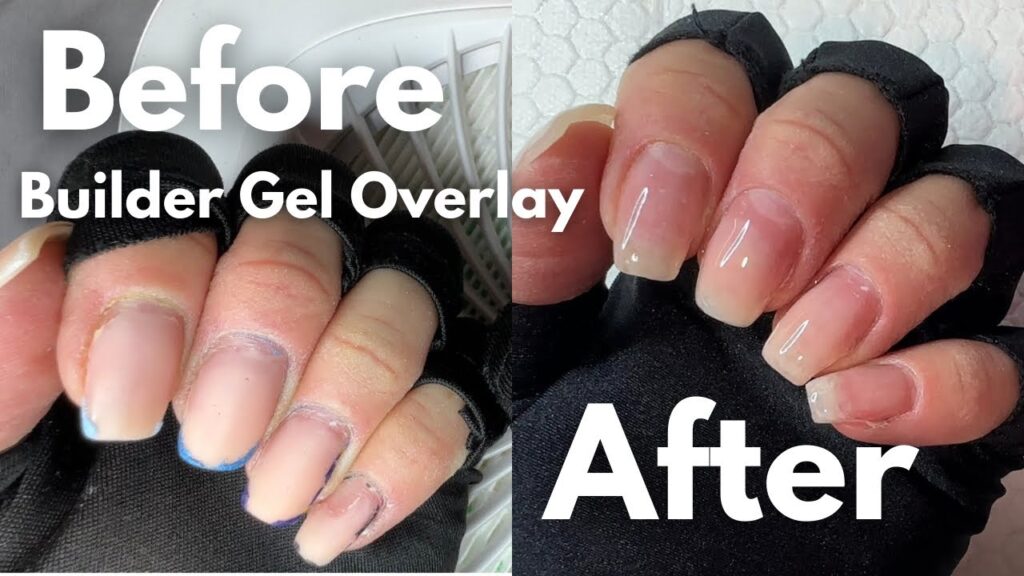
This is a builder gel that you can use as an overlay on your natural nails to get a flawless look and a clean manicure. If you have ridged nails, you broke a nail, they are often exfoliating or they are naturally thin and prone to breakage, this builder gel can help you by providing a layer of added strength.
You can use this as an overlay, but you can even extend your nails using a form. The best thing about this builder gel is that you can soak it off, as opposed to filing or drilling it down. It self-levels nicely and quickly, which means this is not a thick gel, but it’s slightly on the thinner side. That means you can manipulate it without creating many lumps and bumps and it spares you the extra work when it comes to filing and shaping.
It comes with an application brush included, so if you are a beginner and you don’t already have your own tools, this brush is handy. Now you just need a lamp, a base coat that you must apply before you apply the hard gel, and a topcoat finish.
PROS:
• Easy to work with
• Useful for beginners
• Great for reinforcing your natural nails
• Self-leveling
• Application brush included
• You can soak it off
CONS:
• Higher price point
• Not as strong for building nails
3. IBD Hard Gel
The IBD is a well-known brand in the nail industry, but if you are a beginner and you don’t know much about gel manicures, this product is easy to use, it has a balanced level of viscosity (not too thin, nor too thick) and it cures very fast.
You can use it on your natural nails and apply it with a gel brush or use it as a builder gel, adding a form and building a nail from scratch. This pink color is perfect for creating a French manicure, but you can use it on its own to create a natural look.
This hard gel has a self-leveling property, so you won’t have to wait long before you can cure it in the lamp. It cures very fast, of course, depending on the power of your lamp, but it generally takes one minute in an LED lamp and three minutes in a UV lamp. After you apply it and cure it, you can live it as it is and you will have a natural-looking manicure, or you can apply any color on top (gel or regular polish) and then finish it with a topcoat. All in all, this is a great hard gel overlay for beginners, as well as the more advanced, and if you follow the correct steps, you can achieve a professional-looking manicure at home.
PROS:
• Easy to use
• Fast curing time
• Self-leveling
• Large quantity of gel
• Affordable price
CONS:
• You have to have a brush to work with this product
4. Mia Secret Professional Acrylic Nail system
If you like acrylic systems or you want to try them out, Mia Secret has pretty good and affordable products that you can use to strengthen your nails. As you might already know, acrylic is a bit harder than gel and it requires two parts: powder (polymer) and liquid (monomer) in order to harden. If you are not familiar with how acrylic works, it might take a while to get comfortable and gain control over the liquid-powder ratio.
This package includes a clear powder and a bottle of liquid monomer (don’t worry, it’s EMA). It is easy to use, and it doesn’t dry quickly, which means that if you are fairly new at doing acrylic nails, you would have time to make sure everything looks good before it dries.
The acrylic manicure can last a very long time, some even say that it could last three to four weeks. You can put this on your natural nail, after you apply a primer. This one is clear, so it doesn’t have any color, but keep in mind that acrylic is not as clear as gel (it’s a bit cloudy even if you work with the best professional products). So, if you want a flawless manicure, after you’re done drying the acrylic, you can color your nails with regular polish or gel polish. Another thing to keep in mind is that, if you are not used to the smell of the monomer, it could bother you.
At the end of the day, it’s all about personal preference when it comes to the differences between acrylic and gel, but strength-wise, acrylic may be the winner (if you apply it correctly), especially if you have brittle, thin and damaged nails. This liquid-powder duo comes in handy for beginners that want to dive into the acrylic world, so try it out yourself and see if you like it.
PROS:
• Longer drying time
• Affordable price
• Combo package (liquid + powder)
• Great for beginners
• Lasts a few weeks without chipping or lifting
CONS:
• The monomer has a strong smell
• If you are a beginner, it can take you a while to master the liquid to powder ratio
5. Gelish Structure Gel
If you are already used to painting your nails either with regular or gel polish, then you would like this structure gel, as it comes in a bottle. No need for extra brushes and other tools, just a regular gel polish bottle.
This structure gel can be applied after the base coat and you can remove the sticky layer and leave it as it is, or you can finish it with a gel topcoat. The consistency is thicker than what you are used to see in regular gel polishes, but it’s easy to apply and it’s self-leveling fast, so if you didn’t do a fantastic job the first time, don’t worry, it will level to an even shape.
There are two methods of using this. The first one is brushing it on in thin layers, just like you would do with regular gel polish. Cure each layer in the LED/UV lamp and repeat the process until you are happy with the result. The second method is by first applying a thin layer of the structure gel, cure it, and on the second layer, be more generous with the gel and float your brush over the nail, concentrating most of the product in the middle (where the apex is). That way, your nails would look more professional and you won’t risk flooding the cuticle or creating a flat surface on top.
Overall, this structure gel is a great option if you struggle with thin nails, it’s easy to use and it’s affordable. However, it doesn’t provide the strength of a hard gel, but it’s good for shorter natural nails as you are trying to grow them out and keep them from breaking.
PROS:
• Easy to use
• Affordable price
• Doesn’t require additional brushes
CONS:
• It’s not as hard as a hard gel
Hard Gel Nail Overlay Do’s and Dont’s
✅ DO’s (What keeps your overlay looking fresh)
1. Prep the nail properly
Clean, push back cuticles, and lightly buff the nail plate. Any oil or residue = lifting later.
2. Use thin, even layers
Hard gel isn’t about thickness—it’s about structure. Thin layers cure better and look more natural.
3. Cure correctly
Always follow the gel’s recommended curing time with a proper UV/LED lamp. Under-curing weakens the overlay.
4. Seal the edges
Cap the free edge (tip of the nail) to prevent chipping and lifting.
5. Moisturize daily
Cuticle oil is your best friend. Hydrated nails = flexible, longer-lasting overlays.
6. Wear gloves for chores
Cleaning chemicals and water exposure break down gel over time.
7. Get regular fills (every 2–3 weeks)
As your natural nail grows, the balance shifts—fills keep the structure strong and prevent breakage.
❌ DON’Ts (What ruins your overlay fast)
1. Don’t skip nail prep
Applying gel over oily or unprepped nails is the fastest way to cause lifting.
2. Don’t apply thick blobs of gel
Thick layers don’t cure properly and can cause heat spikes (that burning feeling).
3. Don’t pick or peel the gel off
This will take layers of your natural nail with it. If you’ve ever had thin, painful nails after removal—this is why.
4. Don’t use your nails as tools
Opening cans, scraping, or prying = cracks and lifting.
5. Don’t ignore lifting
If you notice lifting, don’t wait. Water can get trapped underneath and lead to infections.
6. Don’t over-file your natural nail
Too much filing weakens the nail plate and makes overlays harder to maintain.
7. Don’t mix incompatible products
Different gel systems sometimes don’t bond well together unless designed to.
Pro Tip (that most people miss)
Hard gel overlays are not extensions—they’re meant to strengthen your natural nail. If you try to grow them too long without proper structure, they’ll snap
F.A.Q’s About The Best Overlay for Natural Nails of 2026 UK
💅 What is an overlay on natural nails?
An overlay is a layer of product (gel, acrylic, or BIAB) applied on top of your natural nail without adding length. It strengthens your nail and gives it a polished look.
👉 Think of it as a protective coating, not an extension.
💅 Is an overlay the same as BIAB?
No—but they overlap.
- Overlay = a technique (putting product over your natural nail)
- BIAB (Builder in a Bottle) = a type of product used for overlays
So yes, BIAB is one kind of overlay, but not all overlays are BIAB.
💅 Does an overlay make nails longer?
No. It keeps your natural length.
- If you want length → extensions (acrylic, gel tips)
- If you want strength → overlay
💅 Is overlay considered fake nails?
Not really.
- Overlay = your real nails underneath
- Acrylic extensions = added fake length
So overlays are more “natural enhancement” than fake nails.
💅 Are overlays good for your nails?
Generally, yes—if done and removed properly.
They:
- Protect weak nails
- Reduce breakage
- Help retain length
BUT:
- Bad removal or over-filing = damage
💅 Does overlay help nails grow?
Indirectly, yes.
Your nails grow anyway—but overlays:
- Prevent breaking
- Help you keep length
💅 How long do overlay nails last?
Usually:
- 2–4 weeks before needing a fill or redo
Depends on:
- Nail growth
- Lifestyle
- Product used
💅 How much is an overlay?
Prices vary by location, but roughly:
- Basic overlay: $20–$50
- BIAB overlay: $30–$70
In places like Lusaka, prices are often on the lower end compared to Western countries.
💅 Is overlay cheaper than acrylic?
Yes, usually.
- Overlay = less product, no extensions
- Acrylic full set = more work + tips
💅 Overlay vs gel vs acrylic vs dip
Overlay vs gel
- Gel overlay = more flexible, natural-looking
- Regular gel polish = thinner, less strengthening
👉 Overlay is better for strength
Overlay vs acrylic
- Acrylic = stronger but harder and more damaging if misused
- Overlay (especially BIAB/gel) = more natural and flexible
👉 Overlay is healthier
Overlay vs dip powder
- Dip = durable but can feel bulky
- Overlay = lighter and more natural
👉 Overlay usually looks more natural
💅 BIAB vs acrylic overlay — which is better?
- BIAB = flexible, healthier, natural look
- Acrylic overlay = stronger but harsher on nails
👉 BIAB wins for nail health
💅 What is the healthiest nail option at a salon?
Best to least harsh:
- BIAB / builder gel overlay
- Gel polish on natural nails
- Dip powder
- Acrylic (most damaging if misused)
👉 The healthiest overall: BIAB overlay
💅 What type of nails are least damaging?
- Short natural nails + BIAB or gel overlay
- Minimal filing
- Proper removal (no ripping!)
💅 Is overlay bad for nails?
No—damage comes from:
- Aggressive filing
- Peeling off product
- Poor technician work
💅 What is the best type of overlay?
Top choices:
- BIAB (best overall)
- Hard gel overlay
- Acrylic overlay (only if you need extra strength)
💅 Disadvantages of acrylic overlays
- Can feel heavy
- Requires more filing
- Strong chemicals
- Can weaken nails over time
💅 Why don’t people do acrylic nails as much anymore?
Trends shifted toward:
- More natural looks
- Healthier options like BIAB
- Lightweight, flexible nails
💅 Which is worse for your nails: gel or acrylic?
👉 Acrylic is worse (generally)
Because:
- Harder removal
- More aggressive prep
- Less flexible
💅 Can you do acrylic overlay on natural nails?
Yes, absolutely—that’s a common service.
💅 Do acrylic overlays damage natural nails?
They can if:
- Over-filed
- Removed incorrectly
- Worn continuously without breaks
💅 What is a natural overlay?
Usually:
- Clear or nude BIAB or gel
- Enhances your nail without dramatic color or length
💅 Does dip or acrylic look more natural?
👉 Dip looks more natural than acrylic—but overlay (especially BIAB) looks the most natural overall.
💅 Final verdict (simple guide)
If you want:
- Healthiest option → BIAB overlay
- Strongest nails → Acrylic (but riskier)
- Most natural look → Gel/BIAB overlay
- Cheapest option → Basic overlay
1. HOW DO I PREP MY NAILS PROPERLY?
Regardless of the product you want to use, be it acrylic, gel, gel polish, regular polish and so on, the preparation should be the same, and you need to make sure you follow these steps if you don’t want your product to lift or chip rather quickly.
• Cleanse the nail (you can do it with alcohol) and make sure you remove the dust and oils
• Push back your cuticles (gently) either with an orange stick, a silicone stick or a metal tool, but be careful not to pry too hard, as you can damage your nail bed
• Lightly buff the nail surface with a gentle buffer. You want to create a surface that is not perfectly smooth so the product can adhere better
• Remove the dust and use alcohol or a dehydrator to remove excess oils and debris
• Put on a primer
• Put on the product of your choice
2. HOW LONG DOES A GEL SET LAST? WHAT ABOUT ACRYLIC?
If you have been careful and meticulous with your preparation, you should be able to get the most out of your product. Usually, good acrylics could last about 3 to 4 weeks, and gels could last 2 to 4 weeks, but it depends on the product’s quality, application technique and preparation. Also, if you want your manicures to be long-lasting, you should consider not using them as tools, keeping them in water for a long time (e.g., washing the dishes) or scrubbing.
3. HOW DO YOU REMOVE OVERLAYS AT HOME?
Whether you have acrylic, gel or dip powder as an overlay, if you want to take it off at home, the easiest way to do that without harming your natural nails is this:
• first, take a medium course file and lightly buff off the shiny layer of your nails
• soak a piece of cotton ball into acetone, wrap it around your nail and seal it with aluminum foil.
• Wait for 10-15 minutes
• Gently scrape the product off. If it’s not yet loose and it still looks glued to the nail, soak it again for another 5 minutes or until it becomes loose.
• After the product is removed, take a buffer and smooth out the surface.
Pingback:Top 5 Best Nail Dust Collectors of 2026 - Couponing 101